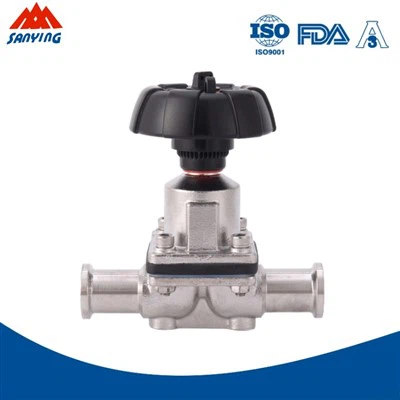
Installing a Weld Manual Sanitary Butterfly Valve in a large - diameter pipeline is a critical task that requires careful planning, proper tools, and a detailed understanding of the process. As a supplier of Weld Manual Sanitary Butterfly Valve, I have witnessed firsthand the importance of correct installation to ensure the valve functions optimally and the pipeline system operates efficiently. In this blog, I will guide you through the step - by - step process of installing such a valve in a large - diameter pipeline.
Pre - installation Preparations
Before you start the installation, it is essential to make thorough preparations. First, you need to select the right valve for your pipeline. Consider factors such as the pipeline diameter, the type of fluid being transported, the pressure and temperature conditions, and the required flow rate. Our Weld Manual Sanitary Butterfly Valve is designed to meet high - standard sanitary requirements, making it suitable for industries such as food and beverage, pharmaceuticals, and dairy.
Inspect the valve and the pipeline. Check the valve for any visible damage during transportation, such as scratches, dents, or misaligned parts. For the pipeline, ensure that the end faces are clean, flat, and free of any debris or corrosion. Measure the pipeline diameter accurately to confirm that it matches the valve size.
Gather all the necessary tools and materials. You will need welding equipment, appropriate welding rods, a torque wrench, a level, a measuring tape, and safety gear such as welding helmets, gloves, and goggles.
Pipeline Preparation
The first step in pipeline preparation is to cut the pipeline to the appropriate length. Use a pipe cutter or a saw to make a clean, straight cut. The cut should be perpendicular to the pipeline axis to ensure a proper fit with the valve. After cutting, deburr the edges of the pipeline to prevent any sharp edges from damaging the valve or causing flow disturbances.
Next, clean the pipeline ends. Remove any rust, scale, or dirt using a wire brush or a grinder. A clean surface is crucial for a strong and leak - free weld. You can also use a degreaser to remove any oil or grease from the pipeline ends.
Mark the position where the valve will be installed on the pipeline. Use a measuring tape to measure the distance from a fixed reference point and mark the center of the valve location. Make sure the marks are clear and accurate.
Valve Installation
Place the valve between the two pipeline sections. Use a level to ensure that the valve is perfectly horizontal or vertical, depending on the installation requirements. Misalignment can lead to uneven stress on the valve and the pipeline, which may cause leaks or premature valve failure.
Align the valve flanges with the pipeline ends. The bolt holes in the valve flanges should match those in the pipeline flanges. Insert the bolts through the holes, but do not tighten them fully at this stage.
Once the valve is properly aligned, tack - weld the valve to the pipeline at several points around the circumference. Tack welding helps to hold the valve in place during the final welding process. Use a small amount of weld material and ensure that the tack welds are strong enough to prevent movement.
Welding Process
Before starting the full - scale welding, it is important to preheat the pipeline and the valve. Preheating helps to reduce the risk of cracking in the weld and the base metal. The preheating temperature depends on the material of the pipeline and the valve, as well as the thickness of the metal. Refer to the welding procedure specification for the recommended preheating temperature.
Use the appropriate welding technique and welding rods for the material of the valve and the pipeline. For stainless steel valves and pipelines, TIG (Tungsten Inert Gas) or MIG (Metal Inert Gas) welding is commonly used. Follow the welding parameters such as welding current, voltage, and travel speed to ensure a high - quality weld.
Weld around the circumference of the valve - pipeline joint in a continuous and uniform manner. Make multiple passes if necessary to build up the weld thickness. After each pass, allow the weld to cool slightly before starting the next pass. This helps to prevent overheating and distortion.
Inspect the weld for any defects such as porosity, cracks, or lack of fusion. If any defects are found, they should be repaired immediately using the appropriate welding repair techniques.
Post - welding Treatment
After the welding is completed, allow the weld to cool naturally. Do not quench the weld with water as this can cause rapid cooling and lead to cracking. Once the weld has cooled, clean the weld area to remove any slag or spatter. Use a wire brush or a grinder to smooth the weld surface.


Conduct a non - destructive test on the weld, such as a visual inspection, a dye penetrant test, or an ultrasonic test. These tests help to detect any internal defects in the weld that may not be visible to the naked eye.
Final Assembly and Testing
Tighten the bolts on the valve flanges using a torque wrench. Refer to the valve manufacturer's instructions for the recommended torque values. Over - tightening or under - tightening the bolts can cause leaks or damage to the valve.
Install any additional components such as actuators, positioners, or sensors, if required. Connect the valve to the control system and ensure that all electrical or pneumatic connections are secure.
Finally, conduct a pressure test on the valve and the pipeline system. Gradually increase the pressure to the operating pressure and hold it for a specified period. Check for any leaks around the valve and the weld joints. If any leaks are detected, identify the source and make the necessary repairs.
Comparison with Other Valve Types
In comparison with Clamped Manual Sanitary Butterfly Valve, the Weld Manual Sanitary Butterfly Valve offers a more permanent and leak - proof solution. Clamped valves are easier to install and remove, which is suitable for applications where frequent disassembly is required. However, for large - diameter pipelines in high - pressure or high - temperature systems, the welded valve provides better structural integrity and long - term reliability.
Maintenance and Troubleshooting
Regular maintenance is essential to ensure the long - term performance of the Weld Manual Sanitary Butterfly Valve. Inspect the valve periodically for any signs of wear, such as valve disc wear, seal damage, or corrosion. Lubricate the valve stem and other moving parts as recommended by the manufacturer.
If you encounter any problems with the valve, such as difficulty in opening or closing, leaks, or abnormal noise, refer to the valve manual for troubleshooting guidance. In some cases, minor adjustments or part replacements may be required.
Conclusion
Installing a Weld Manual Sanitary Butterfly Valve in a large - diameter pipeline is a complex but rewarding process. By following the steps outlined in this blog, you can ensure a successful installation and a reliable pipeline system. Our company is committed to providing high - quality Weld Manual Sanitary Butterfly Valve products and professional technical support. If you are interested in our products or have any questions about valve installation or selection, please feel free to contact us for further discussion and procurement negotiation.
References
- ASME B31.3 Process Piping Code
- AWS D1.1 Structural Welding Code - Steel
- Manufacturer's Installation and Maintenance Manual for Weld Manual Sanitary Butterfly Valve