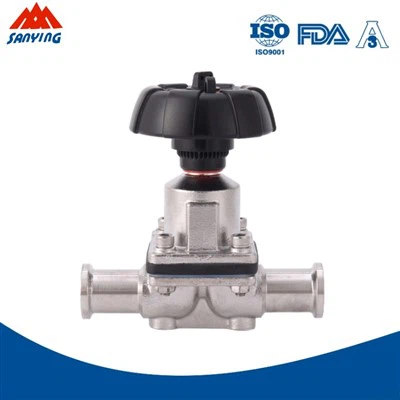
Hey there! As a supplier of electric butterfly valves, I often get asked about the tools needed for installing these nifty devices. So, I thought I'd put together this blog post to share all the essential tools you'll need to get the job done right.
First off, let's talk about what an electric butterfly valve is. It's a type of valve that uses a disc to control the flow of fluid through a pipe. The disc rotates on a shaft, and when it's perpendicular to the flow, it blocks the passage. When it's parallel, the fluid can flow freely. Electric butterfly valves are commonly used in a variety of industries, including water treatment, HVAC, and chemical processing.
Now, let's get into the tools you'll need for installation.
1. Wrenches
Wrenches are a must-have for any valve installation. You'll need a set of adjustable wrenches or socket wrenches to tighten the bolts and nuts that secure the valve to the pipeline. Make sure you have the right size wrenches for the job. If the wrenches are too small, you won't be able to tighten the bolts properly. If they're too big, you might damage the bolts or the valve.
2. Pipe Cutters
If you need to cut the pipeline to fit the valve, you'll need a pipe cutter. There are different types of pipe cutters available, such as manual pipe cutters and power pipe cutters. Manual pipe cutters are suitable for small pipes, while power pipe cutters are better for larger pipes. Make sure you choose a pipe cutter that's appropriate for the type and size of the pipe you're working with.
3. Pipe Threaders
If you're working with threaded pipes, you'll need a pipe threader to create threads on the ends of the pipes. This allows you to connect the valve to the pipeline using threaded fittings. Pipe threaders come in different sizes and styles, so make sure you choose one that's compatible with the pipe size and thread type you need.


4. Sealants and Gaskets
To prevent leaks, you'll need to use sealants and gaskets when installing the valve. Sealants are used to seal the joints between the valve and the pipeline, while gaskets are used to create a tight seal between the valve and the flange. Make sure you choose the right type of sealant and gasket for the application. For example, if you're working with a high-pressure system, you'll need a sealant and gasket that can withstand the pressure.
5. Torque Wrench
A torque wrench is used to tighten the bolts and nuts to the correct torque specification. This is important because if the bolts are not tightened enough, the valve may leak. If they're tightened too much, you may damage the valve or the pipeline. Make sure you follow the manufacturer's instructions for the correct torque specification.
6. Electrical Tools
Since electric butterfly valves are powered by electricity, you'll need some electrical tools to install them. These tools include wire strippers, pliers, screwdrivers, and a multimeter. Wire strippers are used to strip the insulation from the wires, while pliers are used to bend and twist the wires. Screwdrivers are used to tighten the electrical connections, and a multimeter is used to test the electrical circuits.
7. Safety Equipment
Last but not least, you'll need some safety equipment to protect yourself during the installation process. This includes safety glasses, gloves, and a hard hat. Safety glasses protect your eyes from flying debris, gloves protect your hands from cuts and burns, and a hard hat protects your head from falling objects.
Now that you know what tools you need for installing an electric butterfly valve, let's talk about some tips to make the installation process go smoothly.
- Read the Manual: Before you start the installation process, make sure you read the manufacturer's manual carefully. The manual will provide you with detailed instructions on how to install the valve, as well as the correct torque specifications and electrical connections.
- Prepare the Pipeline: Make sure the pipeline is clean and free of debris before you install the valve. This will help prevent leaks and ensure a proper seal.
- Use the Right Tools: Make sure you use the right tools for the job. Using the wrong tools can damage the valve or the pipeline, and may also result in a leaky installation.
- Follow the Torque Specifications: Make sure you follow the manufacturer's instructions for the correct torque specification. Over-tightening or under-tightening the bolts can cause problems.
- Test the Valve: After you've installed the valve, make sure you test it to make sure it's working properly. You can do this by turning on the power and operating the valve.
In conclusion, installing an electric butterfly valve requires a few essential tools, including wrenches, pipe cutters, pipe threaders, sealants and gaskets, a torque wrench, electrical tools, and safety equipment. By following the tips outlined in this blog post, you can ensure a smooth and successful installation.
If you're in the market for an electric butterfly valve, check out our Electric Sanitary Butterfly Valve. We offer a wide range of high-quality electric butterfly valves at competitive prices. If you have any questions or need help with your installation, don't hesitate to contact us. We're here to help you find the right valve for your application and ensure a successful installation.
References:
- Manufacturer's manuals for electric butterfly valves
- Industry standards for valve installation