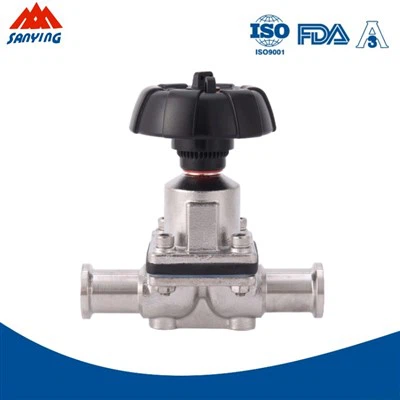
Hey there! I'm a supplier of manual sanitary check valves, and I know how crucial it is to keep these valves clean. A clean manual sanitary check valve not only ensures optimal performance but also extends its lifespan. In this blog, I'll walk you through the step - by - step process of cleaning a manual sanitary check valve.
Why Cleaning is Important
First off, let's talk about why cleaning a manual sanitary check valve is so important. These valves are commonly used in industries like food and beverage, pharmaceuticals, and cosmetics. In these sectors, hygiene is of the utmost importance. Any contamination in the valve can lead to product spoilage, which can be a huge loss for businesses. Also, over time, debris, sediment, and other particles can build up inside the valve. This buildup can restrict the flow of fluid, reduce the valve's efficiency, and even cause it to malfunction. So, regular cleaning is a must.
Tools and Materials You'll Need
Before you start cleaning, gather the necessary tools and materials. You'll need a soft - bristle brush, a clean cloth, a mild detergent or a specialized valve cleaning solution, a container for soaking, and some clean water. Make sure the cleaning solution you choose is compatible with the materials of the valve. For instance, if your valve has rubber components, avoid using a solution that can damage the rubber.
Step 1: Disconnect the Valve
The first step in cleaning a manual sanitary check valve is to disconnect it from the pipeline. This is a crucial safety step. Make sure to turn off the flow of fluid in the pipeline before you start. Use the appropriate tools to loosen the connections. Whether it's a Weld Manual Sanitary Check Valve or a Clamped Manual Sanitary Check Valve, follow the manufacturer's instructions for disconnection.
Step 2: Disassemble the Valve
Once the valve is disconnected, carefully disassemble it. Take note of how each part is arranged so that you can reassemble it correctly later. Usually, a manual sanitary check valve consists of a body, a disc, a spring, and some seals. Place all the parts in a container.


Step 3: Soak the Parts
Fill the container with the cleaning solution and soak the valve parts in it. Let them soak for a sufficient amount of time, usually around 15 - 30 minutes. This soaking process helps to loosen the dirt and debris stuck on the parts. If there are stubborn stains or deposits, you can let them soak for a bit longer.
Step 4: Scrub the Parts
After soaking, take each part out of the container and use the soft - bristle brush to scrub it gently. Pay special attention to the areas where dirt is likely to accumulate, such as the edges of the disc and the inside of the valve body. Be careful not to scratch the parts, as scratches can create areas for future dirt buildup.
Step 5: Rinse the Parts
Once you've scrubbed all the parts, rinse them thoroughly with clean water. Make sure to remove all traces of the cleaning solution. Any remaining cleaning solution can react with the fluid in the pipeline later and cause problems.
Step 6: Dry the Parts
Use a clean cloth to dry the parts. Make sure they are completely dry before reassembling the valve. Moisture left on the parts can lead to corrosion over time.
Step 7: Reassemble the Valve
Now that all the parts are clean and dry, it's time to reassemble the valve. Refer to the notes you took during disassembly to ensure that each part is placed in the correct position. Make sure the seals are properly seated and the spring is installed correctly.
Step 8: Reconnect the Valve
After reassembling the valve, reconnect it to the pipeline. Tighten the connections securely, but don't over - tighten as this can damage the valve or the pipeline.
Tips for Regular Maintenance
To keep your manual sanitary check valve in top condition, here are some tips for regular maintenance. First, establish a regular cleaning schedule. Depending on the usage and the environment, you might need to clean the valve once a month or once every few months. Second, inspect the valve regularly for any signs of wear and tear, such as cracks in the body or damage to the seals. Replace any worn - out parts immediately. Third, keep the area around the valve clean to prevent dirt and debris from entering the valve.
Conclusion
Cleaning a manual sanitary check valve is not a difficult task, but it requires attention to detail. By following the steps I've outlined in this blog, you can ensure that your valve operates efficiently and safely. If you're in the market for a high - quality manual sanitary check valve, or if you have any questions about valve cleaning or maintenance, feel free to reach out. We're here to help you make the best choices for your business needs. Contact us for more information and let's start a great business relationship!
References
- Sanitary Valve Handbook: A Guide to Valve Maintenance and Cleaning
- Industry Standards for Hygiene in Food and Beverage Processing